Our guild sponsored a weekend workshop with wireworker & lampworker Maria Richmond. A fair number of her projects, which I believe she mostly sells as tutorials,[1] include zippers, such as this Phoenix Pendant. An artist after my own heart, she evidently got her start with using metal zippers after salvaging them from old jeans, though she now purchases them by the yard. A cute pro-tip: if the teeth won't separate, pull from the other end!
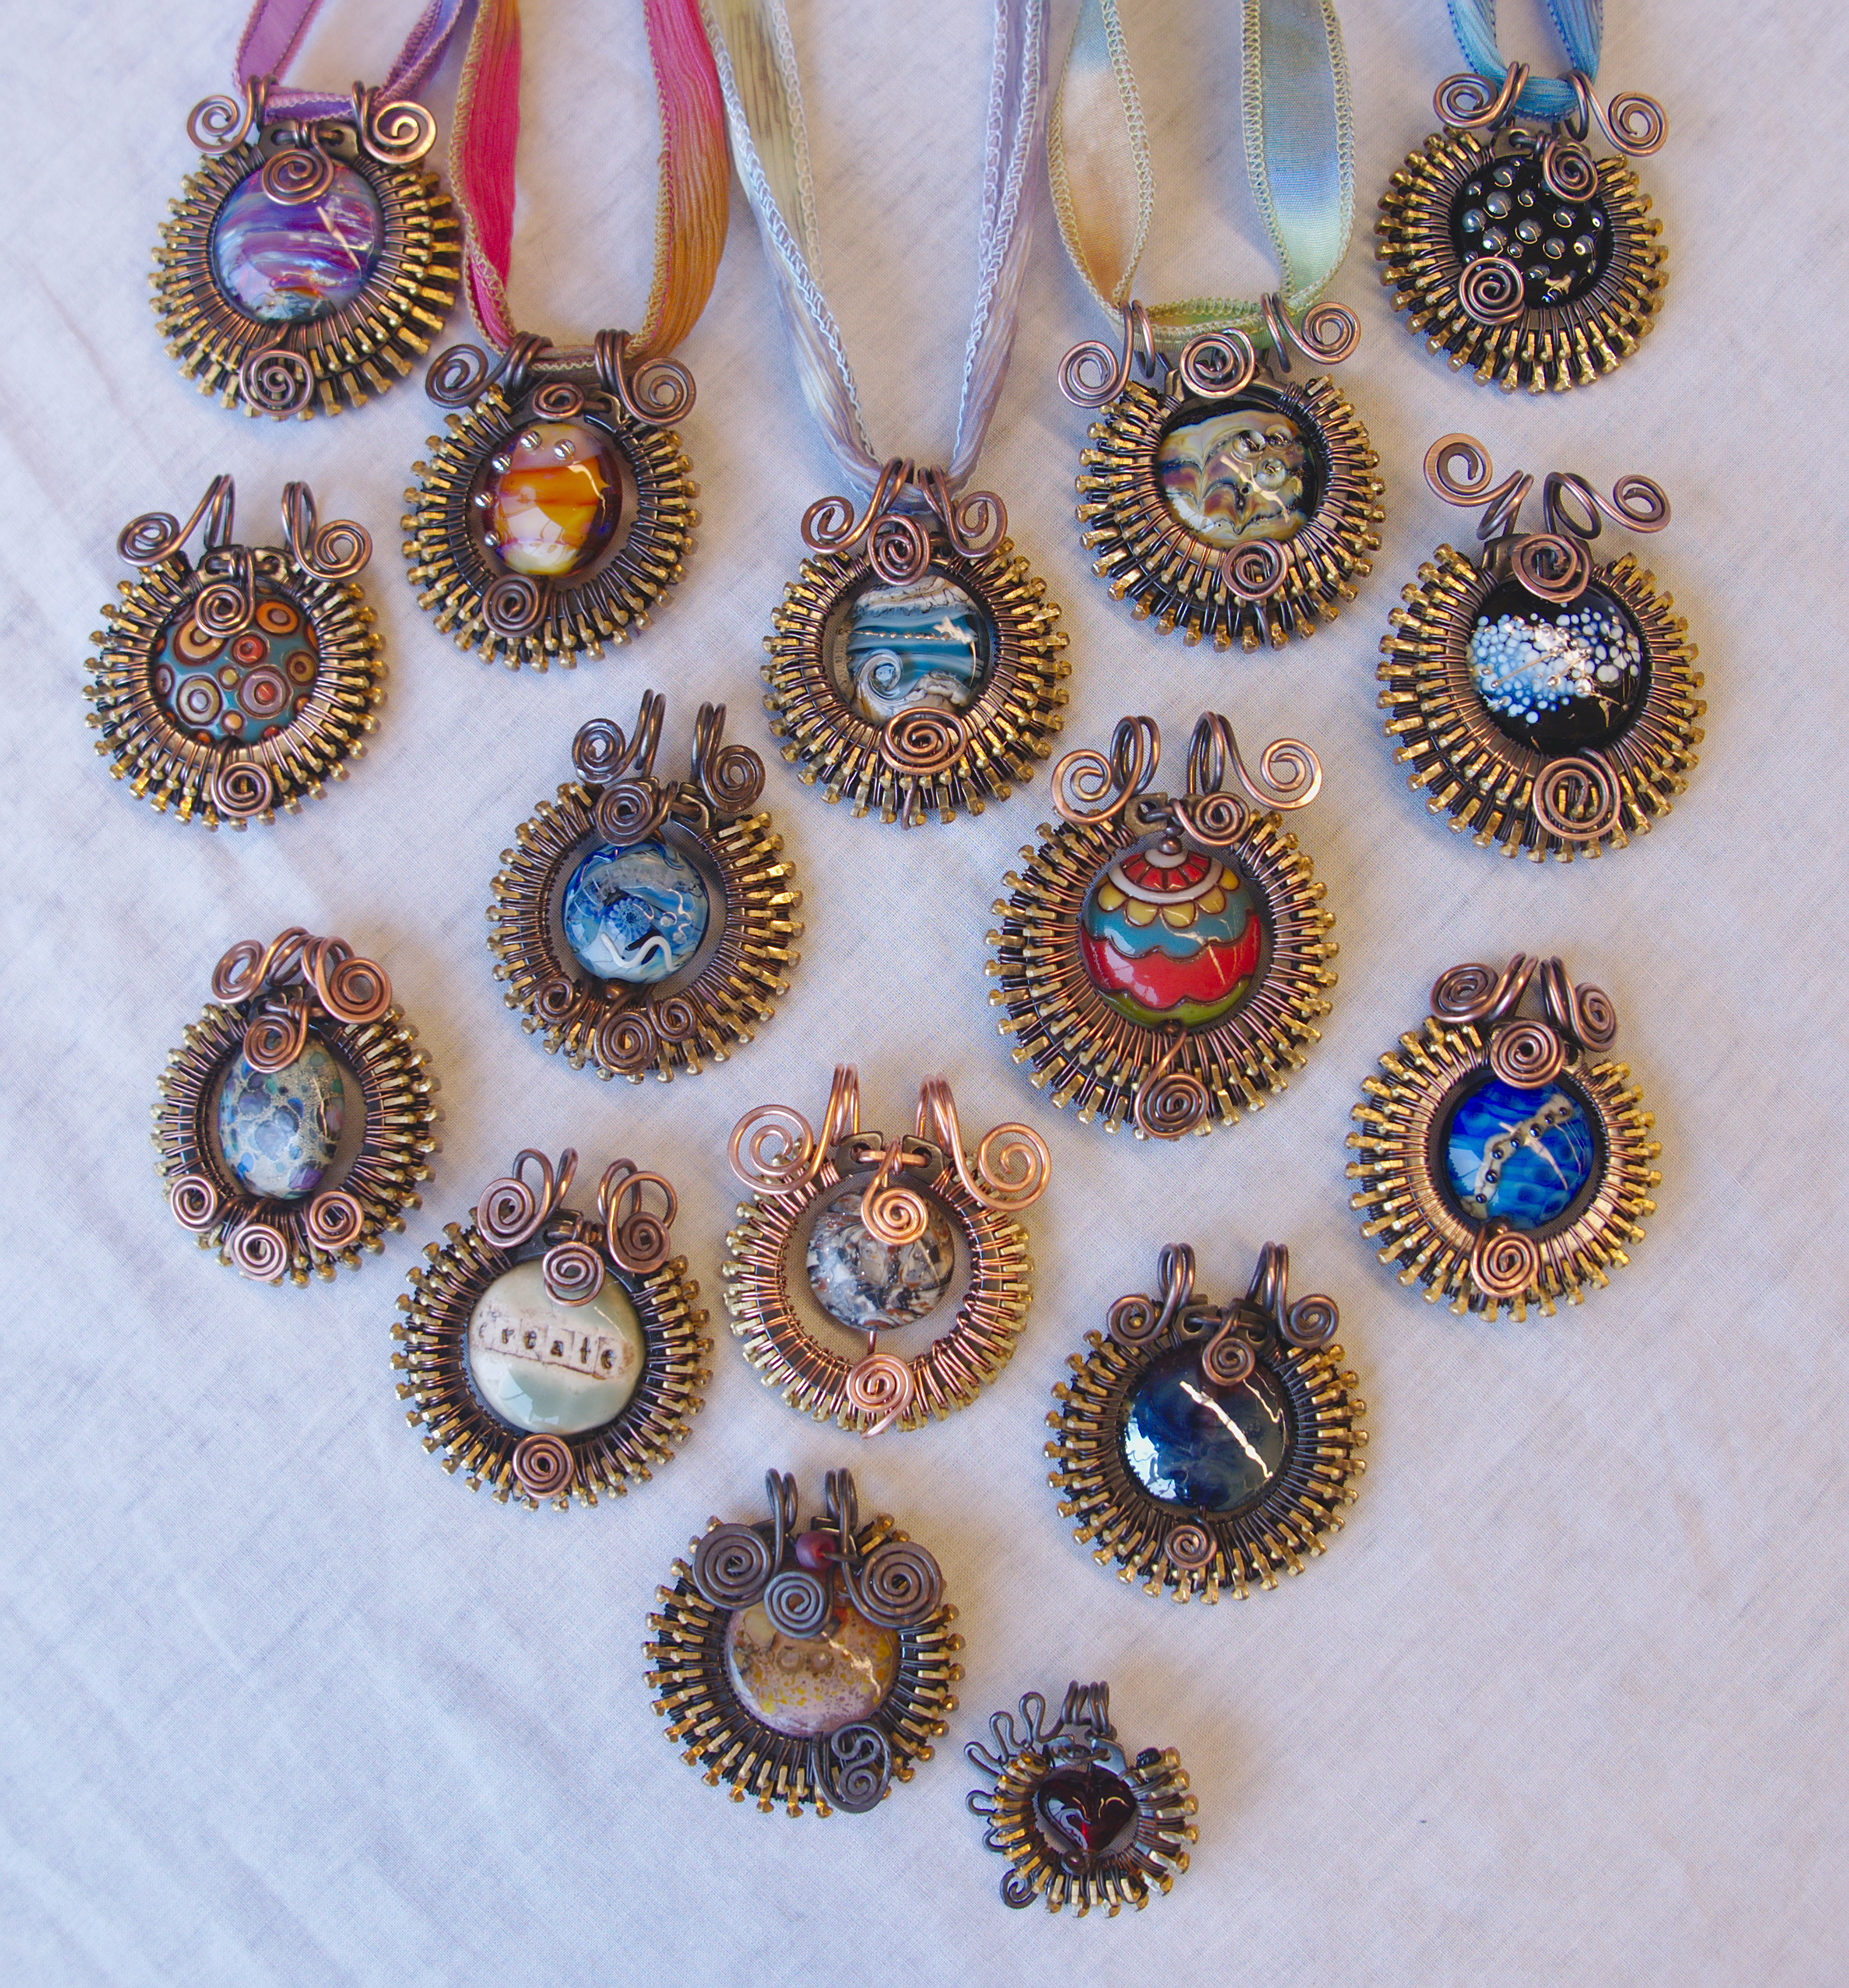
Our pieces from the “Phoenix Pendant” portion of the workshop. September, 2018. Copper, brass, steel, fiber, glass, shot with mixed cloudy daylight and fluorescent, Panasonic LX100. Light RAW editing. As usual, the automatic down-sizing algorithm did a crummy job—click to the see the nice, sharp full-size version!
I'd never worked with zippers before, so this was a new experience. Richmond is a big fan of liver of sulphur—“I'd liver-of-sulphur myself if I could, it fixes so many flaws” —and it certainly blends the reddish copper wire and yellow brass teeth; it also helps to emphasize the teeth, while still yielding a pleasing texture.
Mine, which I would've left out of the photo entirely, because they're without question the ugliest of the bunch, are the bottom two; and they perfectly illustrate why following the directions will give you a better result:)

jpg out of the box.
Then, just because I like to cruise around the net before taking a new teacher & get a sense of what to bring ahead of time, here are the tools I used during the workshop:
- regular & heavy duty round nose pliers
- stepped round nose pliers – optional, I just happened to have them; stepped mandrels would also work, which we all received as part of our welcome package:)
- chain nose pliers
- heavy duty flat nose pliers, preferably nylon jawed
- cutters
- heavy duty, high quality flush cut pliers[2] (teacher had some)
- crimping pliers [3] (teacher had one)
- bench block/anvil, preferably with a high-polish finish (teacher had some)
- hammer, preferably with a high-polish, somewhat rounded face (teacher had some)
- sharpie
- 0000 steel wool/polishing pad (provided)
- liver-of-sulphur (provided)
- lighter (provided)
- quarter inch diameter mandrel–a bic pen works great for this:)
- wire gauge (I left it at home, but fortunately, my table partner brought hers)
- blue painters tape (tho’ not for this particular project) (provided)
- fine wet-dry sandpaper (tho’ not for this particular project)(provided)
- N.b.: I brought a light, but we lucked out and didn't need supplemental lighting, but I recommend it, along with an extension cord & duct tape, unless you're familiar with the venue. Magnifiers are also on my list, but I haven't managed to purchase them. In the meantime, using the 2x magnification on your phone's camera will work as a stopgap.
Tools I wish I had brought:
butane torch (for annealing wire) —Richmond has been working wire at least 20 years, and her hands are stronger than mine, so the half or quarter hard wire was a great balance between stiffness & workability: you get nicer curves with stiffer wire. We were also using heavier gauge wire for weaving than is my preference, though I could—and should—have annealed all the weaving wire with a lighter.
About the teacher: I look for someone who (obviously) knows the material, can handle a wide range of student skills, is patient with people who are frustrated or not getting it, is generous with supplies, and above all, encourages rather discourages students. Plenty of samples to examine & good documentation/instructions are a plus, which we also had. Our class had somewhere between 16 and 20 people, ranging from advanced beginners to relatively sophisticated wireworkers, and I thought everyone got their questions answered, and had enough time with the teacher.
The cost of instruction was very reasonable, though Richmond was able to supplement teaching by selling tutorials, finished pieces and supplies, including a delightful & nicely curated assortment of lampwork beads, which she freely admitted could be purchased direct (artists’ names all supplied) for less cost on the internet—but which many of us nevertheless compelling:)
Our venue (the Columbiere Center) had excellent lighting, good acoustics and (openable) windows on both long sides of the room. The only thing in somewhat short supply was outlets—not as critical as it could've been, as most students didn't need to supplement.
[1]At least, as of this writing, though I think there are also kit versions.
[2]Maria had them for us to use, but they're nearly essential to get the beautiful spiral tips that characterize her work—unless you want to file or forge your wire down to a taper
[3]again, optional, but so useful for spiral tips even if, like me, you despise them for crimping crimps!
Unless otherwise noted, text, image and objects depicted therein copyright 1996--present sylvus tarn.