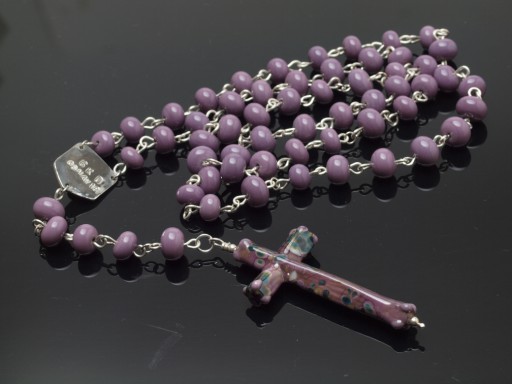
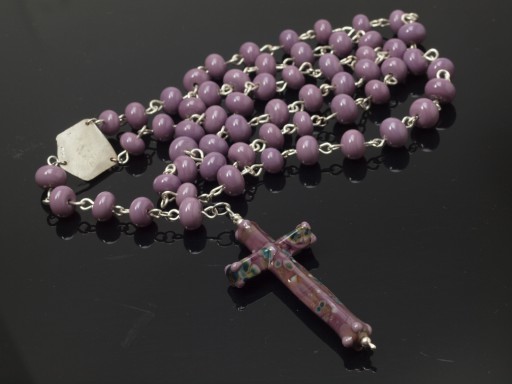
This is the latest in a series of glass bead and silver rosaries I started about a decade ago. Along the way, I simplified the process somewhat, using standard 1/16" mandrels for both the beads and the cross, though I still double dipped, first with krag mud, a high grapite easy-releasing mandrel coating, followed up with fusion, an all-purpose variety, for the crucifix. This is because I haven't much experience with very long beads, which, because of the extended surface area in the whole versus the relative size and weight of the bead, tend to grip mandrels tightly—exactly opposite of the beads I typically make, which have only two thin coils of glass on either end of the hole to hold on.

Once again combined two exposures to lighten the cross and connector, while preserving a relatively true colour on the beads, which otherwise would've been washed out.
I seem to have mislaid my studio notebook from 2015–17, which I'm guessing is when the beads for this project were made: I had not quite enough wire to complete the wirewrapping. I used soldered jump rings to set off the ‘our father’ beads, when I wired them with 19ga half-hard but otherwise they're the same.
Save the connector, two loose beads in the short arm and the cross itself, that's how this project sat for months. I finally borrowed the cruciform press[1] ; then tried making the requisite bead. That failed, so I stepped back and made some practice ones, and tried again, making two for insurance—just as well, because although both came off the mandrel relatively easily, one broke in the pin polisher.

Reverse. rosary, 2018, sterling silver and glass, principly effetre. Cross made 29apr18, connector & piece overall completed and photographed 01may18.
Next, I had to saw out and stamp the connector. I guess if I'd looked up the previous iteration in this series, I could've made a slightly larger round bead with val cox frit[2] but as I knew the date of the recipient's 1st communion ahead of time, I thought it would be nice to stamp that. The precise shape of the connector was dictated by the previous bits sawed out of the metal: per usual, I designed its precise proportions to fit into a space with minimum wastage.
I even dug out my .925 quality stamp, and that was my undoing, because I didn't think of that until I'd already done the initials and date and soldered the rings[3] —and it put a nasty dent on the ‘good’ side of the piece. So, lots more filing and polishing.
At some point or other I made myself a bunch of ball-ended 4" or longer headpins, and waste from those provided the requisite wire to wrap the last two beads. Hallejuah!
But I enjoyed getting back into metal working, even on this very small scale again. And, with quick-disconnects, it's very easy to swap out the torches.
[1]it's a fantastic press, I really ought to just buy my own...
[2]Don't know the name, but it's blue, white and tan frit, obviously reactive with the plum...
[3]On the first try! The hardest part was lighting the n-midget brazing torch, which probably took about 20 tries—turning down the pressure on the regalia to 2.5 was a definite help, as was having a candle to light the torch.
Unless otherwise noted, text, image and objects depicted therein copyright 1996--present sylvus tarn.
Sylvus Tarn