I just love Lani Ching's beads, for a variety of reasons: they have cool patterns; they're fun to make; they're a really fun variation on the dot theme; besides my considerable admiration for the artist—I had a great time at a yoga-for-beadmakers workshop she and her husband led at Gathering (Portland, I believe), besides being deeply impressed by some one who can make such wonderful beads with only 5–6 hours torch time a week. So inspiring for those of us who don't spend 12 hours a day at the torch (and find the claims of those who do being a little prone to, shall we say, a wee tad o'exaggeration...)
Unfortunately the year she gave her demo was the one with all the focusing problems with the videocameras, so it was kind of difficult to follow. I've been making these beads off and on for a number of years; they're one of the benchmarks I use to test my skills. Today I had (for me) particularly good luck with them, so I thought I'd write up some things I keep in mind when making them—though I still have a long, long ways to go before matching Ms. Ching's skill, at least I don't have to convert 2/3 of them into fish anymore!
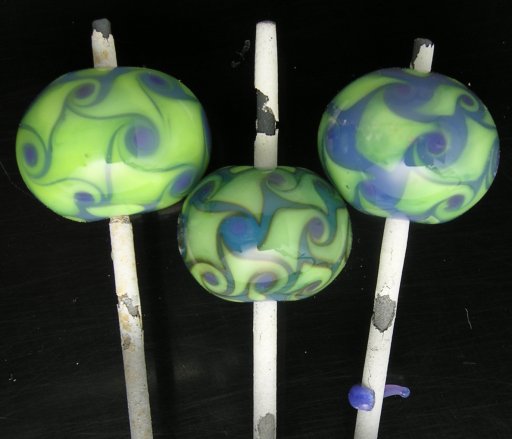
One mandrel shows a favorite trick for pulling stringer on the fly. I heated this one a bit too much: quite often I wrap the stringer halfway around a cold mandrel and it will lift off, without any bead release sticking or breaking off.
Ms. Ching lives near the bullseye factory, and thus, takes advantage of its proximity to get odd-lot colors and the like; and though I'm the last person to say a certain kind of bead has to be made in a particular type of glass, I will note my unusual success happened to occur with all bullseye glass. If you have it, you may wish to start with it.
To prepare, pull a stringer 1mm thick and 30mm long from a rod long enough to serve as a handle (at least 6”). For the blue beads, I used bullseye medium opaque lapis/royal/cobalt (one was that newer slightly more greenish) blue for the base, opaque lime (spring) green for the dots, and opaque gold-purple stringer to twist. If you prefer to make your dots with stringer, prepare that as well. I usually make dots with a full-size rod.
Like most of the beads I make, these are a hollow variation. I start out making a hollow bead, with thicker walls if possible. These are about 13mm hole to hole. The next step is put five rows of graduated dots on it, spacing the dots about 1.5 dot-diameter distance edge to edge (2.5 dot diameter center to center). This applies to the center, or beginning row only. All subsequent dots should be staggered, of course. For the largest bead, this works out to about 2–3mm diameter dot, 6 around. The smaller ones have five dots around. Melt most of the way in. Part of my problem in the past was trying to get the dots completely melted in, which inevitably ruined the holes.
Note also, the glass keeps melting in even after you pull it out of the flame, just like cookies keep baking after you pull ’em out of the oven. When the bead is pretty smooth, it's time to start twisting the dots. —Let bead cool thoroughly, so it's without glow in daytime lighting first. Turn the flame way down (say, 3mm candles on a lynx) and just heat the space between two equatorial dots—be sure heated zone extends up and down to staggered dots above and below as well. (That is, you're heating the diamond shaped area between 4 dots—two equatorial, one above, one below.) The goal is heat only the surface of the glass—in fact, I have the torch turned down so that I have to position the bead at an angle to heat it.
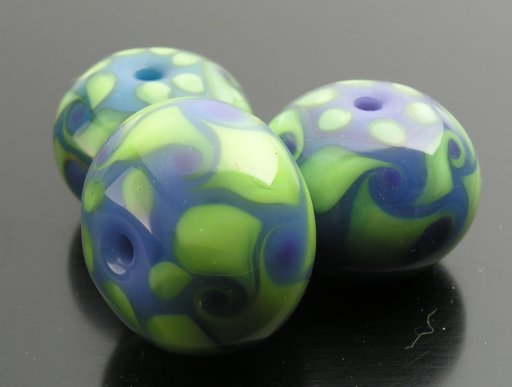
cleaned and ready use. largest bead 13x17mm. Note reduction reaction between one of the blue glasses and the lime green.
When the little region is heated, stick in stringer, and twist. Pulling the stringer with a rod handle gives you additional torque and makes this step easier on your fingers and wrist. However, you shouldn't be torquing the bead enough to break the release, and I note this is very easy-breaking release (because it's easier to remove from transparent hollows.) Blow and snap. Repeat. If you heat the diamond area just long enough only to ‘catch’ edges of the four dots bracketing it, then you won't raise huge swirls that then have to be melted back in. Do the rows above and below. For the basketweave pattern, twist in opposite direction for the 2nd and 3rd rows (e.g. if you twist clockwise for first row, then counter-clockwise for rows above and below; then clockwise for outermost rows).
Crank up heat, and melt in twists. Don't try to get edges by holes perfect; and don't marver—this technique really is about heat and gravity. Heat slowly and evenly to smooth bead. I think another reason this batch came out well because I've been practicing making hollows without a marver lately.
But I admit to feeling lucky that things worked so well:)
file created 09dec05, photos taken & added, plus additional editing, 19dec05
Unless otherwise noted, text, image and objects depicted therein copyright 1996--present sylvus tarn.